“We choose to go to the moon in this decade and do the other things, not because they are easy, but because they are hard, because that goal will serve to organize and measure the best of our energies and skills, because that challenge is one that we are willing to accept, one we are unwilling to postpone, and one which we intend to win.” – President John F. Kennedy, September 12, 1962, Houston, Texas, USA, Earth.
“That’s one small step for man, one giant leap for mankind.” – NASA Astronaut Neil Armstrong, July 21, 1969, Sea of Tranquility, Moon.
We believe learning can and should be fun—you just need the right tools! To celebrate the launch of our Summer 2025 Explorer Camps we’ve teamed up with Moonshotkidz. Experience the joy of STEM learning—just like our campers, with a hands-on interactive activity the whole family can enjoy.
Get ready to have a blast! Explore our latest project with Moonshotkidz founder and creator, Irina Rymshina.
What Is Moonshotkidz All About?
By Irina Rymshina
I see Moonshotkidz as ‘Yoga for the mind’—a fun, hands-on way to reconnect with your sense of wonder and let your imagination soar. We blend traditional tools like paper and color pencils with new ones like acrylic markers and cutting-edge tech like paper electronics, 3D printing, laser cutting, and others. It’s all about playful experimentation, uncovering hidden talents, and proving that creativity has no age limit. Whether you’re sketching after decades or diving into a 3D printer for the first time, Moonshotkidz shows that starting small can lead to big discoveries. It’s about having fun and seeing where those little steps take you, no matter your background or experience.
As the founder of Moonshotkidz, my journey began with a deeply personal spark. When I became a mother, I dove headfirst into my son’s learning adventure. Picture me like a kid in a candy store, eagerly exploring every book, tool, and toy related to creativity and STEM. While playing and experimenting alongside my son, something magical happened—I rediscovered my own inner child. My passion for drawing, arts, and crafts roared back to life. I wasn’t just teaching him; I was equally enthralled, inspired daily to learn, create, and tinker with new materials. Those precious moments with my son and husband ignited a fire in me that I couldn’t keep to myself.
That’s when I started posting my projects on social media, and soon after, I founded Moonshotkidz. But here’s the twist—it’s not just for kids or artists; it’s for everyone. I created Moonshotkidz to help awaken that playful, curious spirit in people of all ages—busy professionals, seniors, executives, you name it. My mission? To inspire you to take those first, easy steps into creativity with beginner-friendly projects. Just like the Moon landing began with ‘one small step,’ every big idea starts with a single, curious experiment.
Beyond the Home
The inspiration doesn’t stop at your doorstep. Visiting places like art museums, science centers, and Space Center Houston takes it to another level. These incredible spaces showcase human ingenuity—think stunning artwork and groundbreaking discoveries—and remind us that anyone can make a difference. They light a spark of possibility, showing that big dreams are built from small, deliberate steps. With Moonshotkidz, family time becomes a launchpad for creativity, connection and aspiration.
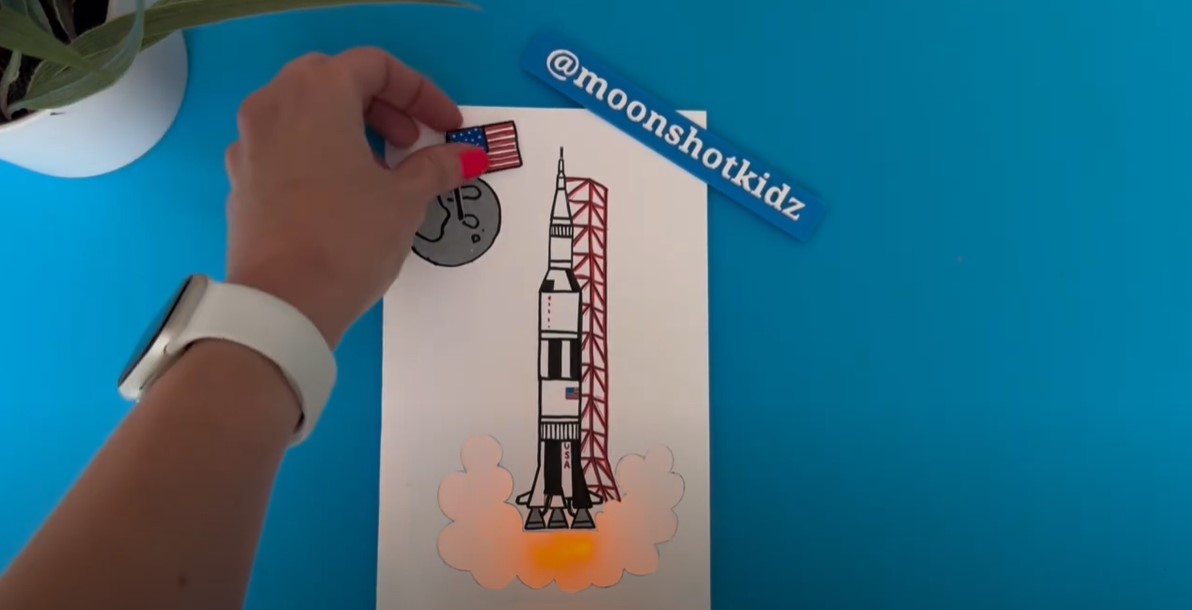
My Moonshotkidz NASA Saturn V Rocket DIY Paper Electronics Project
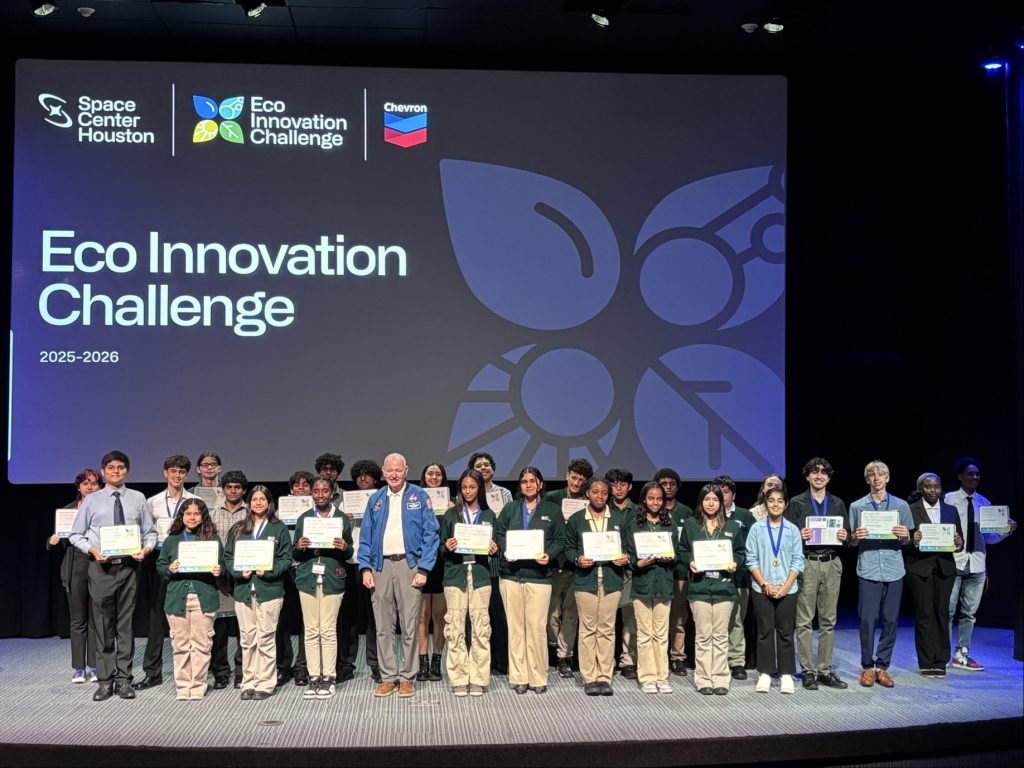
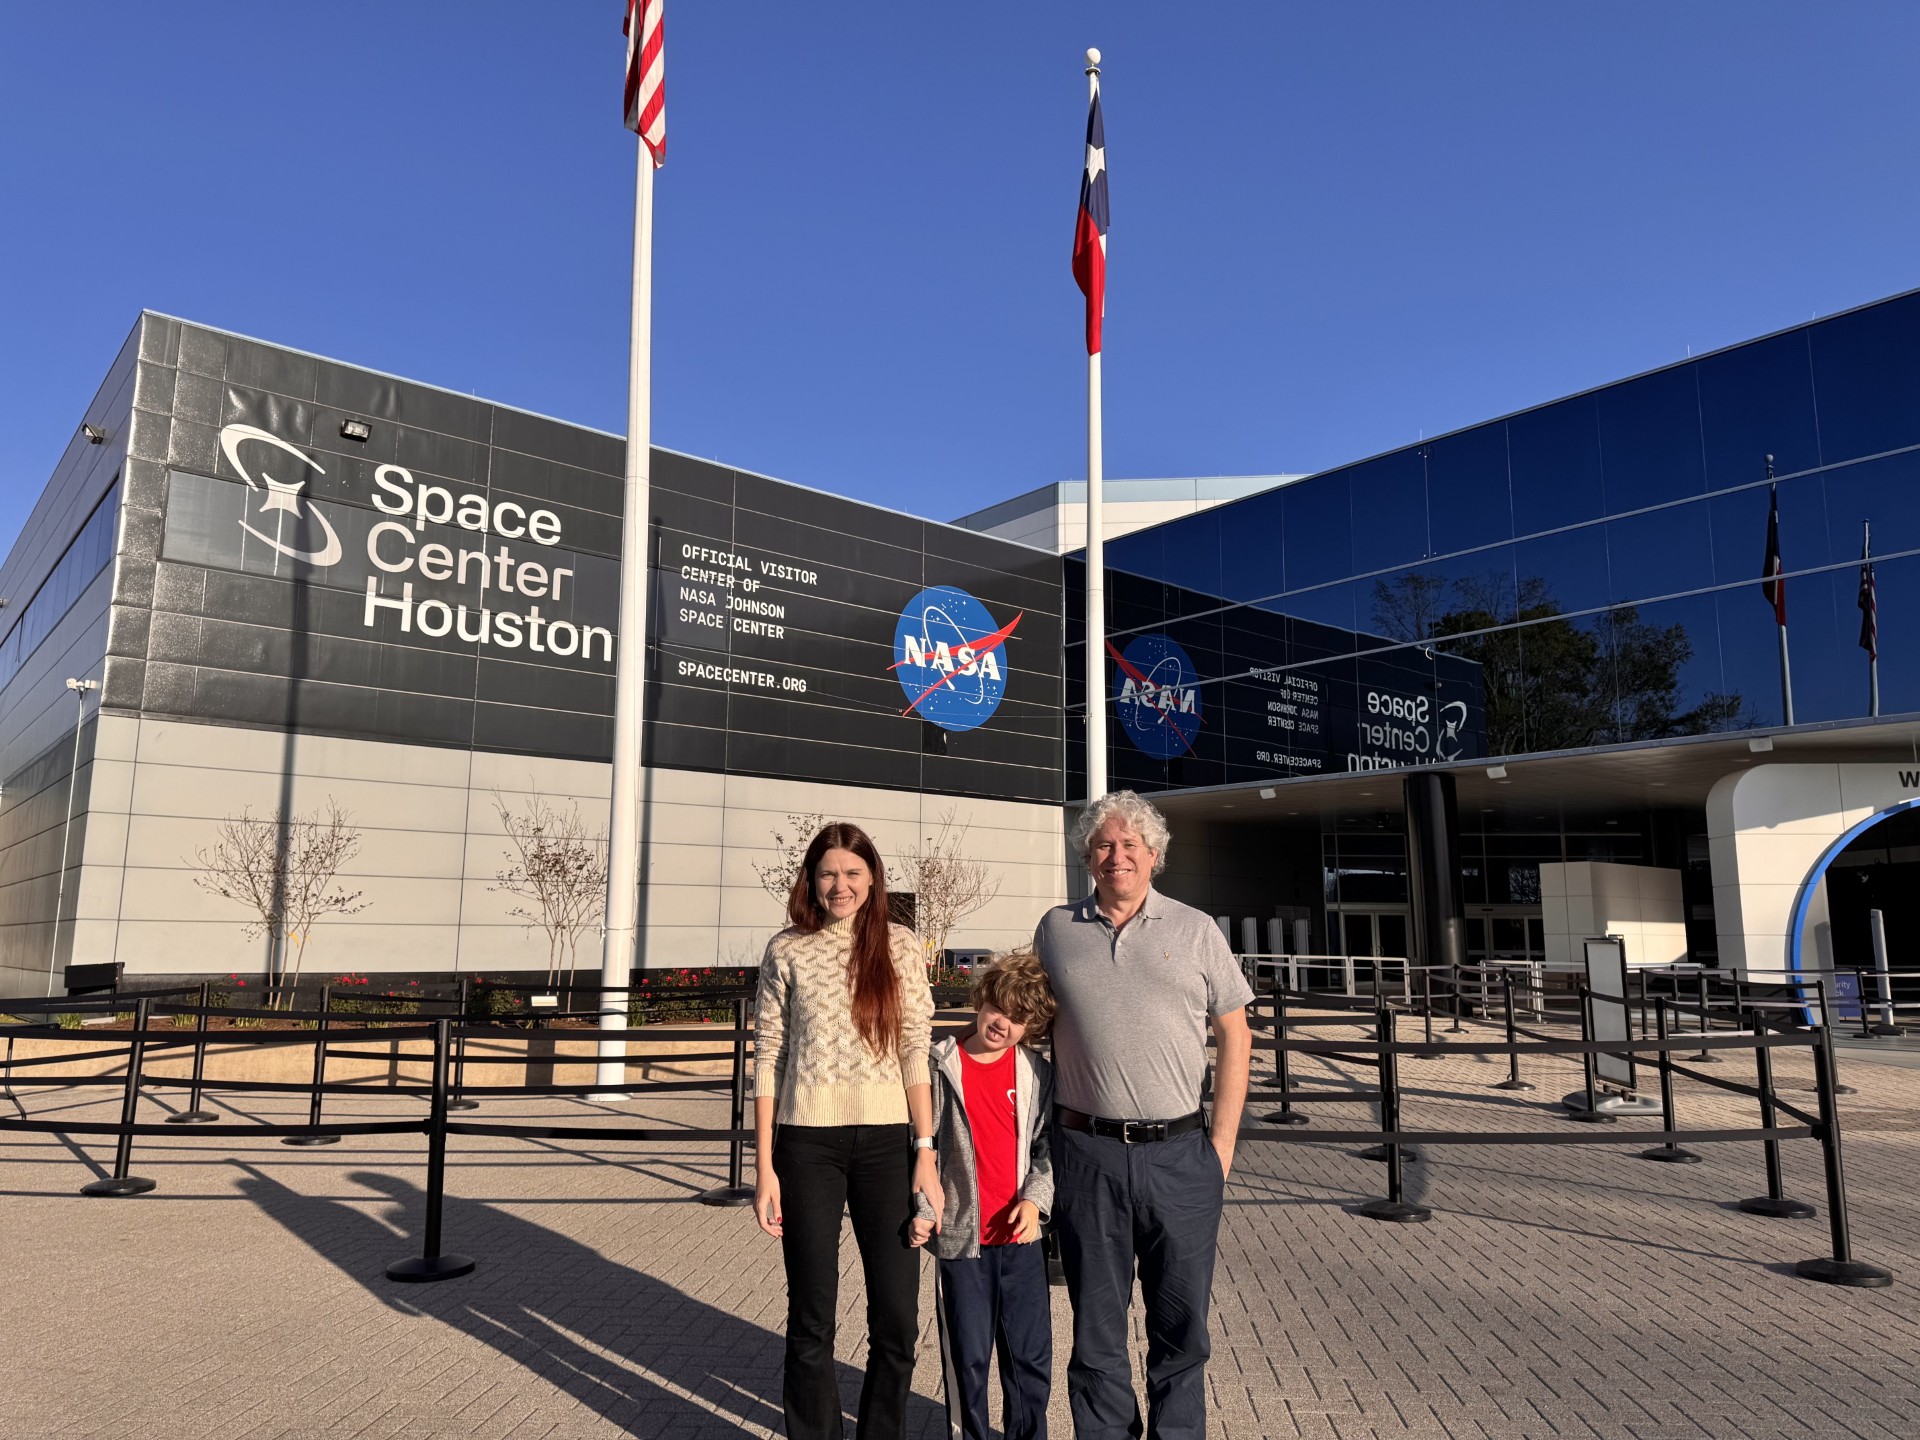
I’m beyond grateful and thrilled that Space Center Houston gifted my son an opportunity to attend its Junior Robotics Explorer Camp—where he had the chance to participate in hands-on activities, just like this DIY project. Having never visited Texas before, this feels like an incredible opportunity for our family. Houston holds a legendary place in history as the beating heart of NASA’s mission to land humans on the moon. It serves as the mission control center, communication lifeline, and decision-making hub, not to mention the home of astronaut training and preparation. The Saturn V rocket stands as a towering symbol of human creativity, technology, and sheer determination—transforming the impossible dream of a person stepping onto the lunar surface into reality. For centuries, millions must have gazed at the night sky, captivated by the moon’s beauty, yearning to reach out and touch it.
When my son was a baby, one of his very first words was “Moon.” He’d stare up at the sky, point with tiny fingers, and chant “Moon, Moon, Moon” in a voice brimming with wonder—a sound so precious it still echoes in my heart. That same sense of awe inspired me to create this simple DIY Paper Electronics project, which I’m so excited to share through Space Center Houston.
This project is more than just a craft—it’s a small spark of that lunar curiosity we all carry. Like the Saturn V, built through countless meticulous steps, it invites you to embark on your own journey of creativity and discovery. I hope it brings you the same joy and wonder my son’s first words brought me.
DIY “NASA Saturn V Rocket” interactive light-up card. Easy and fun paper circuit project for beginners.
You will need:
- 2 LED diodes (orange)
- Conductive copper tape (5mm)
- Coin cell battery 3v (CR2032)
- Magnet (neodymium)
- Paper (176gsm)
- Paper (90gsm)
- Markers
Instructions:
- Draw your space craft and your circuit design. Color it however you like.
- Fold the card in the middle along the dashed line.
- Cut out the outline of the rocket fire (marked with number 1) using a craft knife.
- Cut a piece of thinner paper measuring 8x13cm and glue inside the card. Make sure it covers entire area of the fire. Color it if you like.
- Cut a piece of paper measuring 1.5 x 5 cm. Fold it in half. Glue the switch to the spot indicated
- Stick the conductive tape along paths A and B.
- Place LED diodes on the spots indicated. Ensure the positive (longer) and the negative (shorter) leg are in correct positions.
- Cut four small pieces 1cm each of conductive tape and stick them on top of each leg of the LEDs.
- Stick the conductive tape along paths C and D.
- Stick the conductive tape along path E. Ensure it goes over the switch.
- Cut a 1 cm piece of conductive tape. Fold it into a loop, with the sticky side out, and stick it to the negative (-) side of the battery.
- Place the battery on the spot indicated. Ensure the negative (-) sticky side facing down.
- Test the circuit by pressing on top of the switch.
- Attach four small pieces of double-sided sticky tape to each corner of the card and stick the card together.
- Cut out a flag along the solid line.
- Attach a magnet to the back of the flag using double-sided sticky tape.
- To activate the card, place the flag on the moon.
- You also buy the template for download and print from moonshotkidz.etsy.com